

CSS is a complex language that packs quite a bit of power. We know that CSS, or Cascading Styles Sheets, is a way to style and present HTML. Whereas the HTML is the meaning or content, the style sheet is the presentation of that document.
All styles cascade from the top of a style sheet to the bottom, allowing different styles to be added or overwritten as the style sheet progresses. We already know that CSS is a vast thing, so, I’ll discuss some important rules. Such as,
- Class and Id selectors
- Grouping and Nesting
- Pseudo Classes
- Shorthand Properties
- Background Images
- Page Layout
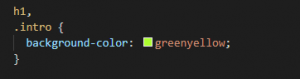
Class and Id selectors
In the CSS, a class selector is a name preceded by a full stop (“.”) and an ID selector is a name preceded by a hash character (“#”).


The difference between an ID and a class is that an ID can be used to identify one element, whereas a class can be used to identify more than one.
Grouping and Nesting
You can give the same properties to a number of selectors without having to repeat them.

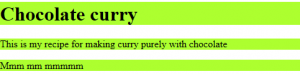
You can simply separate selectors with commas in one line and apply the same properties.
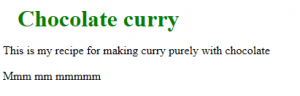
Nesting
If the CSS is structured well, there shouldn’t be a need to use many class or ID selectors. This is because you can specify properties to selectors within other selectors.

Shorthand Properties
Some CSS properties allow a string of values, replacing the need for a number of properties. These are represented by values separated by spaces.
Margins and Padding
Margin allows you to amalgamate margin-top, margin-right, margin-bottom,
and margin-left in the form of property: top right bottom left;

Borders
Border-width can be used in the same way as margin and padding, too. You can also combine border-width, border-color, and border-style with the border property.

![]()
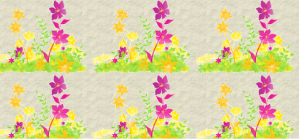
Background image
CSS background images are a powerful way to add detailed presentation to a page.
![]()

Page Layout
Layout with CSS is easy. You just take a chunk of your page and shove it wherever you choose. You can place these chunks absolutely or relative to another chunk.
The position property is used to define whether a box is absolute, relative, static or fixed
Floating a box will shift it to the right or left of a line, with surrounding content flowing around it.
Floating is normally used to shift around smaller chunks within a page, such as pushing a navigation link to the right of a container, but it can also be used with bigger chunks, such as navigation columns. Using float, you can float: left or float: right.
Positioning
The position property is used to define whether a box is absolute, relative, static or fixed:
- static is the default value and renders a box in the normal order of things, as they appear in the HTML.
- relative is much like static but the box can be offset from its original position with the properties top, right, bottom and left.
- absolute pulls a box out of the normal flow of the HTML and delivers it to a world all of its own. In this crazy little world, the absolute box can be placed anywhere on the page using top, right, bottom and left.
- fixed behaves like absolute, but it will absolutely position a box in reference to the browser window as opposed to the web page, so fixed boxes should stay exactly where they are on the screen even when the page is scrolled.
How a box’s position is calculated

A box can be positioned with the top, right, bottom, and left properties. These will have different effects depending on the value of position.
relative: Position is offset from the initial position.
absolute: Taken out of the flow and positioned in relation to the containing box.
fixed: Taken out of the flow and positioned in relation to the viewport. It will not scroll with the rest of the page’s content.
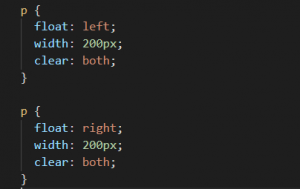
Floating
Floating a box will shift it to the right or left of a line, with surrounding content flowing around it.
Floating is normally used to shift around smaller chunks within a page, such as pushing a navigation link to the right of a container, but it can also be used with bigger chunks, such as navigation columns.
Using float, we can use float: left or float: right
Example:

Rounded Corners
Rounded corners used to be the stuff of constricting solid background images or, for flexible boxes, numerous background images, one per-corner, slapped on multiple nested div elements.
Border radius?
Border radius. Fear not, though — don’t have to have borders. The border-radius property can be used to add a corner to each corner of a box.
Before After


Example: different type of borders –radius measurements

Box Shadows

- The first value is the horizontal offset — how far the shadow is nudged to the right (or left if it’s negative)
- The second value is the vertical offset — how far the shadow is nudged downwards (or upwards if it’s negative)
- The third value is the blur radius — the higher the value the less sharp the shadow. (“0” being absolutely sharp). This is optional — omitting it is equivalent of setting “0”.
- The fourth value is the spread distance — the higher the value, the larger the shadow (“0” being the inherited size of the box). This is also optional — omitting it is equivalent of setting “0”.
- The fifth value is a color. That’s optional, too.


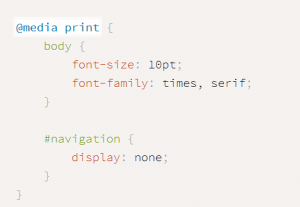
Targeting media types
@media can be used to apply styles to a specific media, such as print.
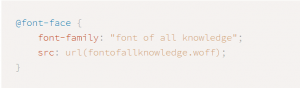
Embedding fonts
It is now widely used as a technique for embedding fonts in a web page
Reference


