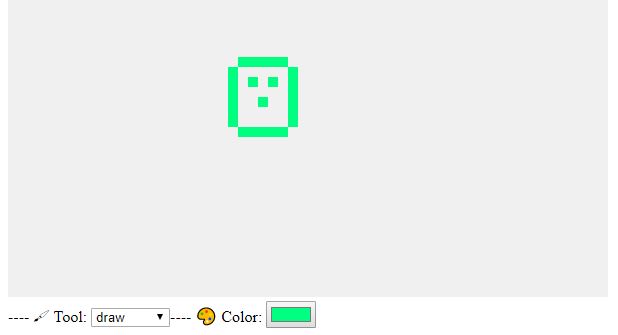
‘A pixel art editor’ application will be a pixel drawing program, where one can modify a picture pixel by pixel by manipulating a zoomed-in view of it, shown as a grid of colored squares. One can use the program to open image files, drawing on them with mouse or other pointer device, and save them. An undo operation may be helpful also. That’s how it looks like-
![]()
This application has two portion. One is the canvas plot to draw the picture and the other is the different function panel below the canvas. But in this article, we will discuss about only how to create the canvas and draw on it with mouse.
THE STATE
We will go through state by state. The state contains the information of particular scenery of the application.
![]()
The application state will be an object with picture, tool, and color properties. The picture is itself an object that stores the width, height, and pixel content of the picture.
![]()
The pixels are stored in an array, in the same way as matrix row by row, from top to bottom. The draw method that expects an array of updated pixels—objects with x, y, and color properties—and creates a new picture with those pixels overwritten. This method uses slice without arguments to copy the entire pixel array—the start of the slice defaults to 0, and the end defaults to the array’s length.
Dom Building
We have the state and picture. Now we need to create our canvas. But we have to append the canvas in the document body using dom property. For knowledge about dom https://www.w3schools.com/js/js_htmldom.asp
![]()
The elt helper function provides a way to create an element and assigns property to domnode(not attributes) and child. This means we can’t use it to set arbitrary attributes, but we can use it to set properties whose value isn’t a string, such as ‘onclick’, which can be set to a function to register a click event handler.
Now, our dom building function is ready. We can start work for the canvas now.
THE Canvas
We said that, the first portion of the application is Canvas that displays the picture as a color of grid. It is responsible for two things: showing a picture & communicating mouse pointer event on picture. It doesn’t know how the application as a whole works. Rather, when responding to pointer events, it calls a callback function provided by the code that created it, which will handle the application-specific parts.If you need any knowledge about Canvas you can go through this https://www.w3schools.com/html/html5_canvas.asp.
![]()
We will draw the each pixel as 10 by 10 measurement as scale =10. The syncState method keeps track of its current picture and does a redraw only when syncState is given a new picture. Now let’s define the drawPicture mehod.
![]()
The drawing function sets the size(hight,width) of the canvas based on the scale and picture size and fills it with a series of squares, one for each pixel.
Now, what will happen when mouse pointer works on canavas? Lets do some stuff for that. When the left mouse button is pressed while the mouse is over the picture canvas, the component calls the pointerDown callback, giving it the position of the pixel that was clicked—in picture coordinates. This will be used to implement mouse interaction with the picture. The callback may return another callback function to be notified when the pointer is moved to a different pixel while the button is held down.
![]()
The PictureCanvas has additional method called mouse in it’s prototype. If you need to know what prototype is then you may read this article http://enlightsolution.com/uncategorized/prototypes-in-javascript/. Let’s define the pointerPosition method.
![]()
We can use getBoundingClientRect to find the position of the canvas on the screen, it is possible to go from mouse event coordinates (clientX and clientY) to picture coordinates. These are always rounded down so that they refer to a specific pixel. So we are getting the mouse position.
We said that we will not do all the functions here in the application. Our goal is to achieve this—
![]()
So, baseControls should be updated to baseControls=[ToolSelect,ColorSelect].
Now we’ll implement the main component (PixelEditor class) as a shell around a picture canvas and a dynamic set of tools and controls(Here just ToolSelect,ColorSelect) that we pass to its constructor.
![]()
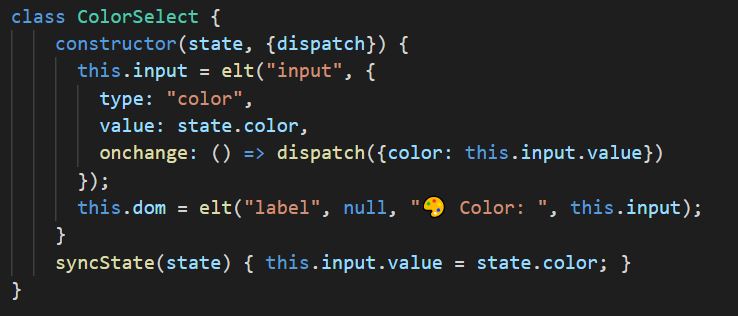
The Control classes are—


Now we have to defind the draw tool that dispatches an action that updates the picture to a version in which the pointed-at pixel is given the currently selected color.

The draw function immediately calls the drawPixel function but then also returns it so that it is called again for newly touched pixels when the user drags or swipes over the picture.
The updateState function can compute a new state. We’ll allow the interface to dispatch actions as objects whose properties overwrite the properties of the previous state.

Now we can test our application—
![]()
And here is our desire output—
![]()


Thats how the Canvas and drawing a picture works in Pixel Editor tool.
Happy Coding :)!!!!!!!!


